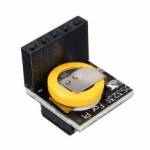
Adding a DS3231 Real Time Clock To The Raspberry Pi, module DS3231 or DS1307
Activation I2C et installation of Real Time Clock
In order to ensure you have got the latest updates you should run the following commands :
sudo apt-get update
sudo apt-get upgrade
sudo apt-get install i2c-tools
I2C activation on Raspberry Pi
sudo raspi-config
Choose 8-Advanced Options → A7 I2C answer Yes and press enter → Ok → Yes → Ok
Now we need to modify a system file using :
sudo nano /etc/modules
If it isn't already there add rtc-ds1307 to the bottom so it looks something like :
- | modules
snd-bcm2835
i2c-bcm2835
i2c-dev
rtc-ds1307
You can save and quit using CTRL-X, Y and ENTER.
restart the system
sudo reboot
Test of I2C interface
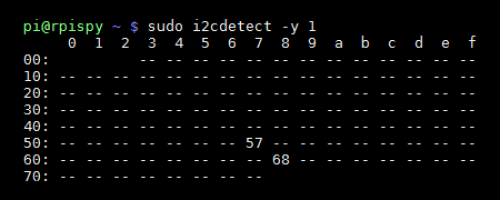
Power up the Pi and run the following command :
sudo i2cdetect -y 1
 <WRAP center round important 60%>
If you are using a Rev 1 you will need to use sudo i2cdetect -y 0.</WRAP>
Commands:
You can read the Pi system time using :
date
If you need to set the system time for any reason you can use the following command :
sudo date -s "29 AUG 2015 13:00:00"
Once correct you can write the system date and time to the RTC module using :
sudo hwclock -w
Should be able to read the date and time back from the RTC using :
sudo hwclock -r
Setup auto update of system date and time :
Update with reboot
Synchronize DS1307 ou DS3231 ;you need add 2 lines in system file:
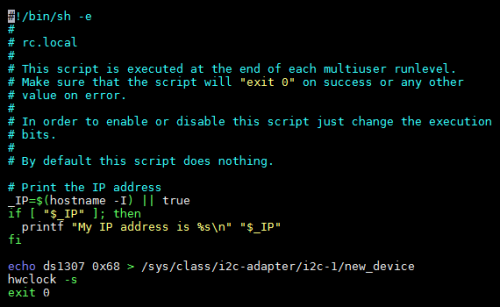
sudo nano /etc/rc.local
Add the following two lines before the exit 0 line : use the line that corresponds to your version
(Raspberry Pi V1)
echo ds1307 0x68 > /sys/class/i2c-adapter/i2c-0/new_device
hwclock -s
(Raspberry Pi V2)
echo ds1307 0x68 > /sys/class/i2c-adapter/i2c-1/new_device
hwclock -s
like this:

reboot system
sudo reboot
Auto update daily
For autoupdated daily you need addd line in CRON files CRON
sudo crontab -e
Clock updated every day at 11h30pm, add folowed lines:
30 23 * * * hwclock -s
You can save and quit using CTRL-X, Y and ENTER. <WRAP center round tip 60%> Force clock update using ntp
sudo service ntp stop
sudo ntpd -gq
sudo service ntp start
</WRAP>
